Let’s Go Serverless!! — Part II (Building Serverless Mobile Application)

Every day new technologies come into play. “Serverless” was one of them. In the perspective of a web developer and web application owner, going Serverless is a cost-effective method. But still, there are pros and cons of going Serverless. So we have to think in the context of the application that we are managing and decide whether to go Serverless or not. “Serverless” has been a hype for some time now. Some months back I wrote a Medium article on Serverless and today I thought to publish another part of it. If you want to know more about “Serverless” please read my previous article from here. It will give you quite some understanding of what “Serverless” actually is.
So in this article, I will be creating a mobile application which is based on Serverless. Mobile applications have two parts similar to web applications.
- Back End
- Front End


Let’s think of an application which gives you general knowledge questions. So you select a question number from the mobile application. Then the mobile application sends a request to Server and get the question details and shows the question to the user. This is how normal mobile applications behave. What are the cons of this architecture?
- The application is not used by users all the time.
It might be 5 minutes per day. But we are running the server which the mobile application connects for 24 hours per day. But the actual usage is 5 minutes. This is where “Serverless” comes in handy. If you are using “Serverless” you won’t be running your backend application for 24 hours. It will only run when the user actually uses the application. It doesn’t matter whether users use your application for 24 hours or 5 seconds. If you are going “Serverless” it’s a no worry. You need not pay for a server which is running for 24 hours daily where actual usage is 5 minutes. What you need to pay for is only for the time that your application ran. Isn’t that cost-saving??
So enough details. Let’s get to work. So what I will be creating is the mobile application backend which consists of APIs. I will not be doing the creating of the mobile front end. That’s up to you :P
For this I will be using AWS API Gateway as the API gateway, AWS Lambda to write serverless functions and DynamoDB as the database.
Creating DynamoDB table


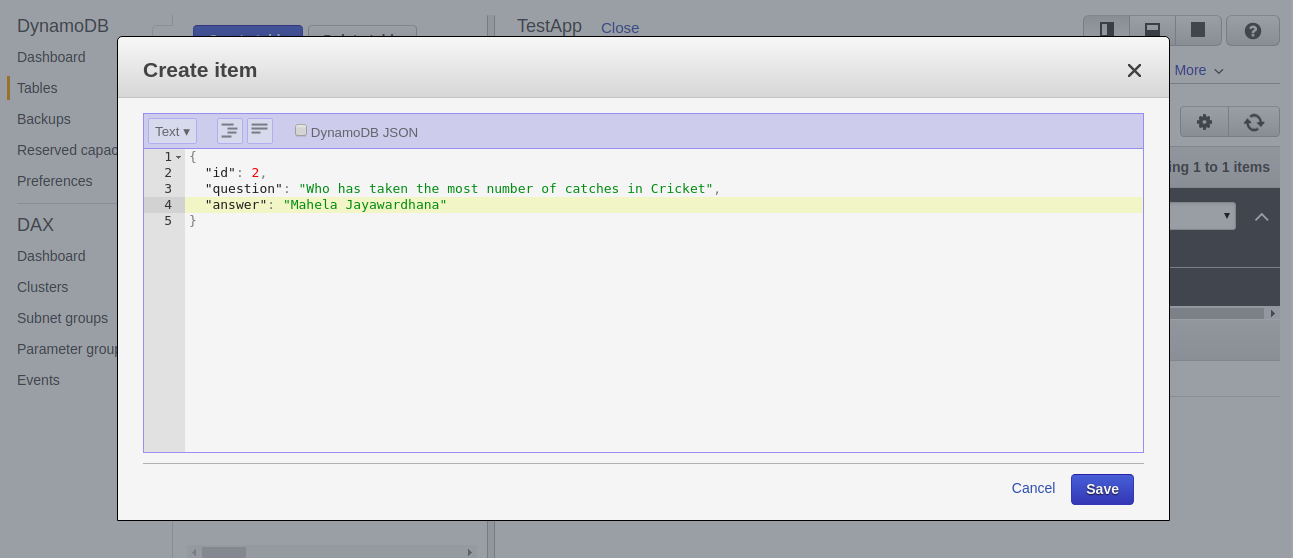

So we have completed creating a table and adding some data to it. Let’s move into the next section.
Creating the API endpoint to be accessed from Mobile Application


To create the API Gateway, go to AWS API Gateway Service. If you want to know more information you can get it from AWS documentation on API Gateway.
Choose the protocol as “REST” and “Create New API”. Give a name and a description for the API. Then hit on “Create API”.

Then click on the “Actions” button and select “Create Resource”. Then give a proper name to your resource and for the resource path.


From here we can configure how to proceed for a GET request made to this endpoint. Since we are planning to execute a Lambda function upon request to this API endpoint we can select “Integration Type” as “Lambda Function”.
Since we didn’t create the Lambda function, we will not be able to configure it from here. So let’s go ahead to Lambda and create the Lambda Function.
Creating the Lambda Function to Fetch Data from Database

So far we have created the table and added some data and also we have created the API endpoint. Let’s go to “Lambda” and create our function. Basically, this function will be triggered by API Gateway. Once we make an API request to the API endpoint that we created, it will trigger this Lambda function that we are going to create. So this function will only run when it’s required to run.
You can get to know more information about AWS Lambda from the AWS documentation on Lambda.
Go to AWS Lambda Service and create a new function. Select “Author from Scratch”. Give the Function a proper name and select the runtime. I’ll select it as NodeJs 8.10. For the “Role”, select “Create a new role from one or more templates”. Then give a name for the role and select the policies to attach and select “Simple microservice permissions” policy. Then hit on “Create Function”. Then you will be taken into a page where you can configure your function. There is an online editor where you can write the function.

Since I need to connect with the DynamoDB to fetch data, I will create a separate file to keep code related to DB data fetching. For that, I’ll create a new file named “dynamo.js”.


You can find the source code from this GitHub Repository.
As a best practice of development never use the important data on the code itself. In this example, I have given the Table Name in the code itself. The recommended way is to use environment variables for those. But in this example, I won’t be doing it.
So we have created our Lambda function. What’s remaining is to map this Lambda function to be triggered from API Gateway. So let’s go to API Gateway Service and configure the rest.
Mapping Lambda Function to API Gateway
Now since we have created our Lambda function we can map it to the API Gateway. For that, we have to again go to the API Gateway Service. Select the API that we created earlier and Select the Lambda function from the Dropdown and “Save” it.

Now if you want to test your API, you can do it from here. Click on the “Test” button and you can run a test to verify whether your API endpoint is working correctly.

Is that all??
Not yet. We have one more step. We have to deploy this API endpoint to be accessed from outside. So let’s deploy it.
Deploying
Now we have to deploy the API endpoint that we just created. For that Click on “Actions” button and select “Deploy API”. When deploying you need to specify the stage of deployment. Specify a stage name and deploy the API.

After deploying, you will get an invoke URL. you can use that invoke URL as the Endpoint URL to access the data.


And Voila!! That’s It!!
So what’s next to complete the working mobile application is to create the mobile app and call this API endpoint that we created.
So I hope I have explained to you how to start developing a mobile application in a serverless manner. Even though what I did is something small, we can build so many things using “Serverless” please go ahead and read more about “Serverless”.
Hope you had a good reading and Thanks for reading!!


Comments
Post a Comment